Coffee grinder clogs rarely begin with a dramatic failure. They start with oily beans, fine particles, and grounds sticking around the burrs. Then the motor sounds strained, the output slows, and your morning routine stalls. How to prevent coffee grinder from clogging comes down to a few repeatable habits: choose beans suited to your grinder, adjust the grind when needed, and clean away residue before it builds up.
A clean burr chamber matters. So does using the grinder as its manual recommends. Small details count: a thin film of coffee oil can collect near the chute, while compacted grounds may hide behind a removable part. The right routine depends on the grinder and the beans. There is no magic fix. Coffee educator James Hoffmann is a relevant specialist in brewing, but I can’t verify a verbatim statement from him specifically about preventing grinder clogs, so I won’t invent one. Instead, this guide focuses on practical, checkable steps and identifies where manufacturer instructions should take priority. Some advice may seem almost too simple. It is still easy to skip. Start with what you can inspect: the burrs, chute, bean texture, and the sound of the motor.
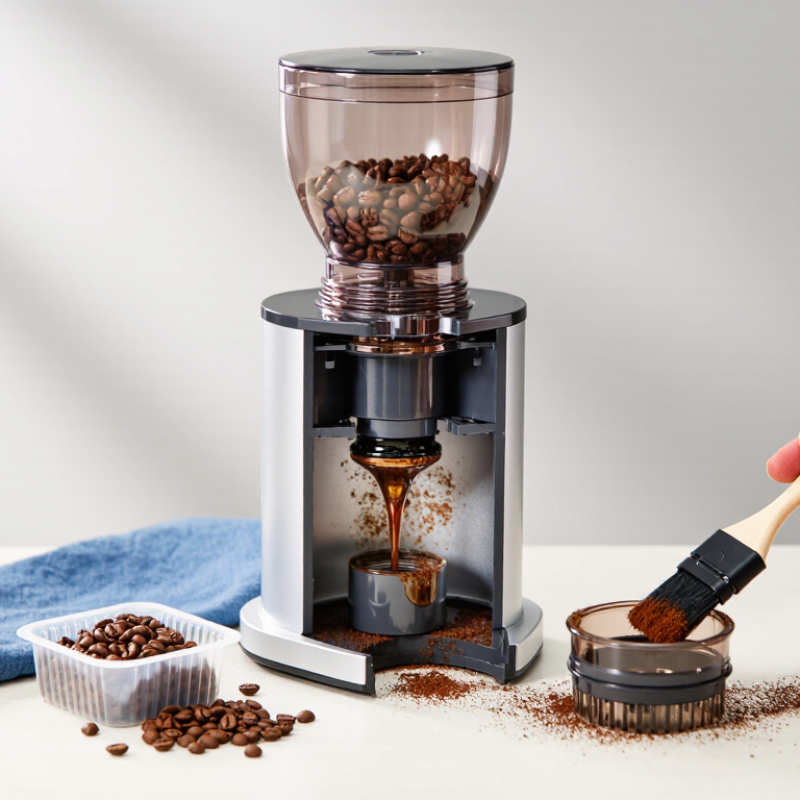
Coffee grinder clogs usually begin with residue, not a sudden mechanical failure. Dark, oily beans leave sticky films on burr edges and inside the chute. Fine grounds then cling to that film, narrowing the exit until coffee trickles out or stops. Very fine settings make the problem worse, especially when the grinder runs continuously. Moisture matters, too: beans stored near a kettle can absorb humidity, making grounds less free-flowing. Small signs count. Look for clumps, a slower dose, or grounds collecting beneath the chute.
Grind adjustment can change coffee flow substantially. A 2019 study in Matter by Cameron and colleagues found that small grind-size changes can shift espresso extraction and flow, underscoring how sensitive the process is. The Specialty Coffee Association’s brewing guidance places target extraction yield around 18–22%; that figure concerns brewed coffee, not grinder clogs, but it highlights why inconsistent particle flow matters. Check the chute and burr chamber for compacted grounds before changing settings. Brush away dry residue, and let damp parts dry fully before reassembly. I still see people blame the beans too quickly. Sometimes the cause is a packed chute, hidden just above the cup.
Choose clean, dry, medium-roast whole beans if your grinder slows or leaves a sticky layer near the burrs. Very oily dark roasts can coat surfaces, while damp or flavored beans may leave residue that catches fine particles. Inspect beans before loading: they should feel dry and show no syrupy coating or foreign debris. Small changes matter. Store beans away from steam, and load only what you plan to grind that day.
Match the grind size to your brew method, then adjust one small step at a time. Fine particles can pack tightly, especially in a humid hopper or after oily beans. The Specialty Coffee Association’s Brewing Control Chart places balanced brewed coffee around 18–22% extraction; that is a brewing benchmark, not a clogging threshold. If coffee tastes weak, move slightly finer. If it drips slowly or clumps, go coarser and inspect the chute. Keep notes on roast, dose, and setting, but treat them as clues rather than rules. Humidity and bean age can shift the result, and yesterday’s residue may be the real culprit.
| Coffee or Grinding Factor | Typical Clogging Risk | Why It Can Cause Problems | Practical Prevention |
|---|---|---|---|
| Very dark, visibly oily beans | High | Surface oils and fine coffee residue can build up on burrs, chute walls, and internal surfaces. | Choose beans with a drier surface when possible. If using oily beans, grind smaller batches and clean the grinder more often. |
| Light or medium-roast beans with a dry surface | Low | These beans generally leave less visible oil residue than very dark, oily beans, though all coffee produces some grounds and fines. | Store beans in a cool, dry place and use them while fresh. Check the grinder periodically for accumulated grounds. |
| Espresso-fine setting | Moderate to high | Very fine particles can collect in narrow passages, especially if the grinder is dirty or the beans are oily. | Use a fine setting only when the brewing method requires it. Adjust in small steps and clean the chute if grounds stop flowing freely. |
| Medium setting for drip or pour-over | Low to moderate | A medium grind is less likely than an extremely fine grind to pack tightly inside a grinder, though grinder design and bean condition matter. | Start near the grinder’s recommended range for the brewing method, then make small adjustments based on taste and brew time. |
| Coarse setting for French press or cold brew | Low | Coarser grounds are less prone to compacting in the discharge path, but old residue or foreign material can still obstruct the grinder. | Use a consistent coarse setting and keep the hopper and grounds outlet free of stale grounds. |
| Changing repeatedly between very fine and coarse settings | Moderate | Grounds retained inside the burr chamber or chute can mix with the next grind and may contribute to uneven flow. | Follow the grinder’s instructions for adjusting settings. On models that require it, adjust while the grinder is running to avoid trapping beans between burrs. |
| Large, tightly packed batches | Moderate | Overfilling can restrict bean movement in some hoppers and may make it harder to notice a developing blockage. | Keep bean quantities within the grinder’s stated capacity and grind only what is needed for the brew. |
| Grounds left in the chute or burr area | High over time | Retained grounds can become compacted, stale, or oily, narrowing the path through which fresh grounds exit. | Unplug the grinder before cleaning. Use a suitable brush and follow the manufacturer’s cleaning instructions; do not rinse electrical parts. |
| Foreign objects or damaged beans | High | Stones or other hard objects can jam or damage burrs and may stop the grinder from turning. | Inspect beans while pouring them into the hopper. If the grinder jams or makes an unusual sound, switch it off and unplug it before checking for an obstruction. |
| Storing beans in a humid or exposed place | Moderate | Moisture and exposure to air can affect bean condition and may contribute to inconsistent grinding or residue buildup. | Keep beans sealed in a clean, dry container away from heat, direct sunlight, and moisture. |
Note: Clogging risk varies by grinder design, bean condition, grind size, and cleaning routine. Use the grinder’s operating and maintenance instructions as the primary guide.
Start with clean, dry whole beans. Check the dose before grinding, and pick out any visible stones or damaged beans. Even one hard object can interrupt feeding or damage burrs. Let beans stored in a cool place reach room temperature before grinding; cold beans may collect condensation in humid kitchens. Keep them away from sinks and steam.
Use a small, measured amount rather than filling the hopper to the brim. Pour beans steadily, so they settle naturally instead of forming a tight pile. Don’t shake or tap the grinder while it runs. If the motor slows or beans stop moving, switch it off and follow the grinder’s cleaning instructions. Forcing more beans into the opening can make a minor blockage worse.
Bean choice matters, too. Very oily or flavored beans can leave sticky residue that catches coffee particles over time. A dry-looking bean is not a guarantee, but it is a useful clue. I still find it tempting to blame the grind setting first. Often, the hopper simply needs less coffee and a steadier feed. Small adjustments help. If clogging keeps returning, inspect the beans and grinder together, rather than changing several things at once.
Coffee grinder clogging often starts with fine grounds and coffee oils collecting around the burrs. The National Coffee Association’s 2024 National Coffee Data Trends report found that 67% of U.S. adults had coffee in the past day. For many homes, grinding is a daily task, so small deposits can build up quickly. Unplug the grinder before cleaning. Remove the hopper and accessible parts as directed in its manual, then brush loose grounds from the burrs. Use a soft, dry brush; moisture can encourage residue to stick. Don’t force the burrs apart if the manual does not recommend it.
The chamber and chute need attention, too. Wipe the chamber with a dry cloth, then gently clear the chute with a narrow grinder brush. A wooden or plastic tool may help loosen a stubborn plug, but avoid sharp metal objects that could scratch parts. Check the chute opening from both ends if accessible. A little buildup can be easy to miss. I’d also watch for a slower-than-usual grind or grounds clumping together; neither proves a clog, but both are useful prompts to inspect the path.
Tips: Clean when the grinder is unplugged and fully cool. Brush away dry grounds before using any approved cleaning method. If oily residue remains, follow the manufacturer’s instructions rather than adding water by guesswork. Then grind a small amount of beans and check that grounds exit freely.
A useful grinder-maintenance routine starts with noticing small changes, not waiting for a full blockage. Before each use, check the hopper for stale grounds, oily residue, or foreign debris. After grinding, unplug the machine and brush loose particles from the chute and accessible surfaces with a dry, soft brush. Keep fingers away from the burrs. A little residue is easy to miss.
Set a weekly reminder to inspect the hopper and the area around the burrs. Follow the grinder’s manual before removing parts; designs differ, and forcing a component can cause damage. Avoid water on burrs unless the instructions explicitly allow it. Moisture can encourage corrosion or leave grounds packed into narrow spaces. Keep a simple log of cleaning dates, grind settings, and changes in output. If grounds begin clumping or flow slows, check for buildup before changing the setting. That assumption is not always right. Beans and humidity can affect flow, too. For frequent use or oily beans, inspect more often. Stop using the grinder if you notice damaged burrs, unusual grinding noises, or a loose part, and arrange qualified service.
A practical starter schedule for a home grinder used regularly. Adjust the intervals for your grinder’s manual, usage, and the oils in your beans.
Regularly clearing loose grounds and inspecting the burr chamber and outlet can help reduce buildup that contributes to clogging.
Unplug it and let it cool completely. Remove only the parts its manual allows.
Use a soft, dry brush to remove loose grounds. Don’t force the burrs apart.
Gently brush the chute with a narrow grinder brush. A wooden or plastic tool may loosen a stubborn plug.
Check the grinder’s instructions first. Guessing with water may leave grounds packed inside.
Check it before each use for debris or oily residue. Set a weekly reminder for a closer inspection.
Slower output or clumped grounds can be useful clues. Neither confirms a clog.
Inspect for buildup first. Beans and humidity can also affect flow. I’ve blamed the setting too quickly before.
Stop if you notice damaged burrs, unusual noise, or a loose part. Arrange qualified service.
Preventing coffee grinder clogging starts with understanding what causes it. Excessively oily beans, overly fine grind settings, moisture, and feeding too many beans at once can cause grounds to stick or block the grinder’s passage. Choose beans suited to your grinder, adjust the grind gradually, and avoid grinding beans that are damp or unusually oily. Feed beans steadily rather than forcing a large amount into the hopper, and make sure the grinder is switched off before adjusting or clearing it.
A consistent cleaning routine helps keep the burrs, grinding chamber, and chute free of compacted grounds. Use appropriate tools to remove residue, and avoid introducing water unless the grinder’s instructions specifically allow it. Inspect the grinder regularly for buildup, worn parts, or changes in grinding performance. These simple habits explain How to prevent coffee grinder from clogging and can support smoother, more reliable grinding over time.

Sophia Electric Appliance